Wednesday, October 26, 2011

Happy belated...

So two things to belatedly celebrate - my friend Kathleen's birthday, and my first blogaversary! (Okay, I promise to never use that word again.) For me, a year of blogging is an accomplishment - so let's pretend the pictures below are for both occasions :)


For Kathleen's birthday, I hosted a 'comfort' theme party...meaning, I made some of my favorite comfort foods and encouraged everyone to wear comfy clothes so we could just relax and enjoy some games and each other's company. On the menu? Chicken casserole, homemade tomato soup and grilled cheese, butternut squash gratin with pesto, and apple tarts for dessert.


Eating our comforting dinner
This chicken casserole is something my mom has made for as long as I can remember; I even requested it as my birthday dinner growing up. It's totally unsophisticated - heck, it's only 6 ingredients! - and yet totally comforting and delicious. Think of it like chicken pot pie in casserole form - yum!


Mom's Chicken Casserole
(super-stuffed 13x9 serves 12, regular 13x9 serves 8)


1 stick unsalted butter, melted
1 bag regular-seasoning stuffing mix
1 8-oz container sour cream
1 14.5-oz can of low sodium chicken broth
1 14.5-oz can of cream of chicken soup
2 rotisserie chickens, meat taken off the bones and shredded (sure, you can cook some chicken yourself, but why complicate an otherwise no-fuss dish?)
1/2 bag of frozen peas/carrots mix (optional - my mom doesn't do this, but I felt a little guilty serving all that comfort food so I threw in some veggies!)


Preheat the oven to 350 degrees. In a large bowl, add the bag of stuffing mix and the stick of melted butter (hey, I never said this was healthy) and mix it all together to distribute the butter. Spread 2/3 of the stuffing mixture onto the bottom of a 13x9 baking dish. In another bowl, whisk together the sour cream, the cream of chicken soup and 3/4 of the can of chicken broth until it's combined and smooth. Add the cooked, shredded chicken evenly around the baking dish on top of the stuffing, then pour the sour cream/soup mixture over the chicken and spread out so all the nooks and crannies get covered. Top it all off with the other 1/3 of the stuffing mix, then drizzle the remaining 1/4 can of broth over the top of the whole thing. Bake for 40 minutes, or until it's bubbly and golden brown and crispy on top.


Kathleen blowing out her scented, non-birthday-candle candle

Everyone does birthday cake, right? I had to go for individual apple tarts!

Tuesday, September 20, 2011

Roasty toasty soup

Surely, sweltering summer said sayonara and autumn arrived abruptly...
(Annie adores alliteration!)

...which is why I'm bringing back soup! That, and also because once again, I was too lazy to go grocery shopping. Yup, another weeknight, another dinner born from ingredients on hand and a little experimentation. I'm psyched to say that this is now going to be one of my go-to soup recipes! You can use regular peppers and tomatoes in this, but the fire-roasted variety lend a smoky, slow-building heat that's incredibly warming - and the addition of brown rice and lentils makes it a healthful and filling meal in a bowl.


Fire-Roasted Tomato and Red Pepper Soup
(makes about 4 servings)

1 T olive oil
1/2 c chopped onions (about 1/2 medium onion)
2 t ground cumin
1/2 t ground coriander
1 t chili powder
1/4 t freshly ground black pepper
1 jar fire-roasted bell peppers, drained and chopped
1 14.5 oz can fire-roasted or 'chili-ready' chopped tomatoes with juice
1/2 t kosher salt
1/4 c to 1/2 c chicken/vegetable stock or water
1/4 c dried lentils, picked over and rinsed (I used French green lentils)
1/4 c short-grain brown rice (I used a boil-in-bag)

(Note: Cook the lentils and rice together in a separate pot while the soup is going, and undercook them, as they'll finish in the soup - refer to your package directions and go about with about 5 minutes less cooking time. Also, 1/4 c of each may not sound like a lot, but trust me - your soup will be packed!)

In a 2-qt saucepan, heat the oil over medium heat and add the onions, sweating for about 1 minute. Add the cumin, coriander, chili powder and black pepper to the onions, and cook for another 5 minutes, until the onions have softened and the spices have become fragrant and toasted. Add in the chopped roasted peppers and stir to coat in the onion/spice mixture, cooking for about 1 minute. Add in the can of tomatoes along with the juice and the salt, stir everything to combine, and turn up the heat to bring the mixture up to a simmer for about 2 minutes. Turn off the heat, and carefully transfer the mixture to a food processor (or use a blender/immersion blender); first process on low for about 30 seconds to get things going, then scrape down the sides and continue to puree until the soup is almost entirely smooth. In between your pulses, add the chicken/veg stock or broth, using your judgement about how much you need. If you had a really juicy can of tomatoes, you may need less, and if your mixture is really thick, you may need more. I used about 1/2 c total of additional liquid.

When the soup is the desired consistency, transfer it back to the original saucepan and bring up to a simmer. Add in the slightly undercooked lentils and rice, and allow everything to simmer together for another 5 minutes. Serve with crackers or crusty bread!

Wednesday, August 31, 2011

Aarti Party in my kitchen

One of my favorite shows is Next Food Network Star - I feel like it's one of the few reality/competition shows that still focuses on what's important (um hello, the FOOD!) and mostly avoids mind-numbingly dumb drama. [SPOILER ALERT] I'm excited that Jeff won this year, I can't wait to try out some of his terrific Sandwich King recipes. I'm also a fan of last season's winner, Aarti Sequiera - she's so genuine and loveable, I'm really glad she won and is now sharing her love of Indian food with the masses.

Having recently scored a huge knob of fragrant, spicy ginger, I knew I wanted to use it in something with the classic Indian spices I already had. Although at some point I'd like to attempt Chicken Tikka Masala or Indian Butter Chicken, the ingredient lists and number of steps can be impossibly long - and last night, I wanted something a little simpler. Aarti's recipe for Kheema looked quick and straightforward and got great reviews, so I decided to go with it, swapping turkey for beef. Bonus - no trip to the grocery store needed!


It's kind of like an Indian-style shepard's pie (minus the pie part)


Kheema (Indian Ground Beef / Turkey with Peas)
adapted from Aarti Sequiera (original recipe here)

2 T olive oil

1 medium onion or 1/2 large onion, finely diced
3 cloves garlic, minced
1-inch thumb fresh ginger, peeled and minced
2 t ground coriander
1 t paprika
1/2 t garam masala
1/2 t ground cumin
1/4 t cayenne
1 T tomato paste
1 pkg ground turkey (1-1 1/4 lbs)
1/2 large sweet potato (about 1 1/2 c), chopped into 1/2" pieces
1/3 c water
1 t kosher salt
1/4 t freshly ground black pepper
1/2 c frozen peas, thawed
2 t apple cider vinegar
1 t frozen chopped cilantro (if you have fresh, use about 1/4 c chopped)

In a large skillet, heat the oil on medium, then add the onions and cook until golden. Add the garlic and ginger, and saute for another minute. Stir in the spices (coriander, paprika, garam masala, cumin, cayenne) and cook for 2-3 minutes, until the spices have toasted and the onion/garlic/ginger mixture has taken on a deep color and fragrance. Add the tomato paste and really work it into the mixture, stirring and cooking for another 2 minutes.

Add the turkey, breaking up lumps with a spoon, and saute for about 5 minutes (meat will not be done yet). Add the sweet potatoes and stir to combine, then season with salt and pepper and cook another 2-3 minutes. Next, turn up the heat to medium-high and add the water, then simmer covered for about 3-5 minutes until potatoes are cooked through. Remove the cover and add the frozen peas, vinegar and cilantro. Stir to incorporate everything, allowing to cook for another minute (the peas will warm through in this time). 
For serving: I spooned this on top of oat groats I'd cooked overnight in the slow cooker earlier this week, but you can serve with rice, naan or even tortillas.

Sunday, August 21, 2011

Fast, fresh Friday fiesta

When I think of fresh and simple summer cooking, Mexican-inspired food often comes to mind. Maybe it's the citrus (I LOVE LIME), or the fresh veggies, or the fact that it's so easy to vegetarianize...whatever it is, I love it! On Friday my friend came over to watch a movie, and we noshed on what I like to call Fiesta Bowls (not to be confused with the football game) beforehand.


We layered romaine lettuce, cilantro-lime brown rice, black beans with scallions and cumin, and this salsa (plus the addition of fresh-off-the-cob corn) in wide bowls and topped with some crunchy tortilla chips. With a crisp, cold Corona in hand, it's the perfect light and healthy summer supper.


Our bowl station ready to go - they're endlessly customizable!


With the chips, for a glamour shot.

Friday, August 5, 2011

Breaking the spell(t)

Okay folks - let's talk about SUMMER. I LOVE SUMMER. For months and months of gray dreariness in Chicago winter and spring, I wait longingly for the turning of the season...for sundresses, for ice cream, for reading in the park, for wearing sunglasses...

However, in case you're unaware, this summer Chicago has experienced a nearly unbearable and prolonged explosion of heat and humidity, so much so that I can barely sleep, and our oven hasn't been used in at least 2 months. Maybe it's like this every year, and we simply forget about it while huddled in our thermal blankets in February. Either way, I love summer, and despite its sometimes icky-stickyness, I'll embrace it just to counteract the other seasons.

Anyway, the point of this soliloquy: since it's been so hot, as I mentioned, I haven't wanted to use my oven. But, when Bob's Red Mill products were on sale at Dominick's a while back,  I couldn't resist picking up some spelt flour. And if there's one thing I know about flour, it's that you use it...in baking. After some quick online searches, I found a great recipe, and it (along with the flour) has been sitting on my counter for weeks, waiting for a cool enough day to justify using the oven. 

Today was the day my non-baking spell(t) was broken - and I'm so glad it was.


Cranberry Orange Spelt Muffins
slightly adapted from King Arthur Whole Grain Baking - makes 6 muffins and 1 loaf, or 12 muffins

1 1/4 c dried cranberries
1/2 c orange juice
1 1/4 c whole spelt flour
1 c AP flour
1 T baking powder
1/2 tsp salt
3/4 c milk
1/4 c honey
2 large eggs
1 T olive oil
2 T fresh orange zest
1/2 c chopped walnuts
Notes: 2 medium-sized oranges will give you enough juice and zest for this recipe. You'll notice this recipe calls for an overnight rest; this is to allow the spelt flour enough time to absorb moisture from the other ingredients so it's not too dense. If overnight isn't doable, a 2-hour rest should do the job.

Microwave the orange juice on high in a heatproof bowl for about 30 seconds, then add the cranberries and cover with plastic wrap (the juice won't totally cover the cranberries; that's okay). In a large bowl, whisk together the spelt flour, AP flour, baking powder, and salt. In a separate bowl, whisk together milk, honey, eggs, oil and orange zest. Add the wet ingredients to dry, mixing just until flour is incorporated. Fold in the walnuts and cranberries/orange juice until just combined. Cover bowl and refrigerate batter overnight.

Streusel
3 T unsalted butter, softened
1/4 c brown sugar
2 T rolled oats
1/4 c chopped walnuts
Mix together all the above ingredients in a small bowl until crumbly.
When ready to bake, preheat the oven to 400 degrees and remove the batter from the  refrigerator. Scoop batter into a lightly greased muffin tin (or loaf pan) until almost full, and spoon about 1 t of the streusel on top of each muffin (or spread some over the loaf).

Bake at 400 F until golden brown and a toothpick inserted in the center comes out clean - for my tray of 6 muffins in my toaster oven, this took about 18 minutes. For the loaf pan which I did after the muffins, it was about 25 minutes - but I covered it with foil after 15 minutes.

Wednesday, June 29, 2011

Ravioli is not a four letter word

I have a great summer Saturday routine. Wake up around 9, throw on some easy clothes, grab my grocery bags, and head out the door. I stop by the corner store for some fair trade coffee, then stroll through the farmers' market, taking in the sights, sounds and smells of the best wares the Midwest has to offer.


This particular Saturday, a particularly vibrant vegetable caught my eye - and just like that, I knew what I was making for dinner.


*Note: You CAN make ravioli! Yes, you! Sure, there's a pasta-from-scratch way which can be spectacular when you have the time and patience - but there's no reason not to use this method and whip together some fresh ravioli on any given weeknight.


Cavolo e prosciutto ravioli in brodo
(Kale and prosciutto ravioli in broth)
Makes 12 raviolis


For the ravioli:
1/2 large bunch of kale - any variety will work; organic and local if possible! :)
4 oz part-skim ricotta cheese
1/4 c grated parmesan cheese
4 thin slices prosciutto, thinly sliced into ribbons
1/2 t salt
1/2 t black pepper
pinch freshly grated nutmeg
1 egg, beaten
24 wonton wrappers


For the brodo (1 serving):
1 1/2 c good quality homemade chicken stock (the thicker and richer, the better)


To prepare the kale, rinse it well and tear the leaves off of the stems - but do not cut or chop. In a large Dutch oven or stock pot, bring about two inches of water to a boil. Add the kale leaves, using a spoon to submerge them, and allow to blanch for about a minute. Drain the water and kale into a colander, and allow the kale to cool for a moment. Grab a clean kitchen towel or some paper towels and wring out the moisture, then stack the kale on a cutting board, chop, and add to a medium bowl.

To the bowl, add the ricotta cheese, parmesan cheese, prosciutto ribbons, salt, pepper, and nutmeg. Using a regular spoon, mix the ravioli filling together until well combined - and since there's no egg, feel free to taste and adjust seasonings as needed.

I like to use a cutting board as my 'staging area' for assemble the ravioli, with my egg wash (the 1 egg beaten with a little water, in a small bowl) one one side and the filling bowl on the other. Since wonton wrappers can dry out easily when exposed to air, keep a damp paper towel over the stack of them while you work. Lay out two wrappers side by side. Spoon about 2 teaspoons of filling to the center of one wonton wrapper - don't overfill! You don't want it to burst and come out during cooking. Using a pastry brush or your finger, outline each wrapper with some egg wash, then flip one of the wrappers onto the other, lining up the edges. Use your finger to get out any air bubbles, then use a fork to crimp the the edges closed all the way around. If you're not cooking your raviolis right away, you can layer then in a tupperware with parchment or wax paper, and store in the fridge for up to three days (or freezer for longer).


Sorry for the extra-poor image quality - my camera is broken at the moment, so these are phone pics!

To prepare the ravioli in brodo: In a large pot, skillet or saucepan, heat up your 1 1/2 cups chicken stock to a boil, and slide in the raviolis one at a time (about 6 per serving). Unlike when cooking pasta, when you use a large pot full of lots of liquid, in this case, it should be very shallow. The ravioli only take about 3 minutes to cook because the wonton wrappers are so thin, and cooking them shallow helps prevent them from breaking open. Gently remove the ravioli to a large, shallow bowl, and pour the brodo over them. Serve with a sprinkle of freshly grated black pepper and some more parm.

Wednesday, June 15, 2011

Europe in review, part two

All right folks, continuing on my European culinary journey, I left the Netherlands and headed for Germany. After a quick stop in Koln to visit an old family friend, we continued on to a wonderful little town on the Rhine called Bacharach.


After a steep hike to drop our bags off at the hostel (which was a legit CASTLE, by the way) and then another hike back down, we had worked up a big appetite for dinner.  We chose a little place on the main road that had a nice outdoor seating area, and proceeded to have our most memorable meal of the trip.


Tuesday, June 7, 2011

Europe in review, part one: A culinary adventure

After 2+ glorious weeks overseas, I'm now back in sweet home Chicago readjusting to reality. Laundry is done, pantry shelves are restocked, work emails have been answered, and pictures have been loaded and shared...except here!


My friend Kathleen and I were fearless in trying new things. We tried local specialties in every place we visited, and sought out historic eateries as well as less touristy places.


In our guilt-free vacation vortex, we ate and drank what we wanted, when we wanted - no guilt allowed :) Here are some highlights...


Allow me to kick things off with our first beer of the trip, a freshly poured Heineken in Amsterdam.

Monday, May 16, 2011

Bon voyage!

Just wanted to let you all know I'm taking a little trip...to Europe! Wooooooo!!! This trip has been a long time coming, and I'm so excited to eat and drink my way through Amsterdam, Germany and Prague.


Don't worry, when I get back I'll do a full post on some of my favorite meals, foods, beers, wines, restaurants, etc, complete with pictures. Have a great few weeks, everyone!

Saturday, May 7, 2011

The easiest and Frenchiest weeknight dinner

I love the term 'a la marinière' - it just sounds so...French! What does it mean? Basically it refers to seafood (usually shellfish; especially mussels or 'moules') cooked mariner's style, with white wine and herbs. Katie P from Food Wine & Mod Podge and I have been taking a French gastronomy and culture class together at Loyola, and especially after seeing her recent post on mussels, I was inspired to grab some for myself and whip up a French-inspired 20-minute meal.

A note about buying mussels: I got mine at Whole Foods, and even though the fish guy picked them out himself, unfortunately he didn't do a great job - I had to get rid of almost half of them before cooking because the shells were cracked or they were open. So, lesson learned - next time I'll make sure that they look closer and I get my money's worth! :)


Fruits de Mer a la Marinière

olive oil
3 shallots, finely chopped
3 garlic cloves, minced
2 cups white wine (like sauvignon blanc)
1 tilapia fillet, cut into 1-inch pieces
1 lb mussels, cleaned and de-bearded
2-3 T fresh parsley, chopped

In a large skillet (try 12"), heat a few teaspoons of olive oil over medium heat and add the shallots and garlic. Breathe in the delicious smell as they cook for several minutes, just starting to soften but not brown. Seriously, does anything smell as good as sauteeing onions and garlic? Add the white wine, and bring it to a rolling boil for about a minute. Lower the heat to a simmer, add the mussels and tilapia and cover the skillet. Wiggling occasionally (the covered skillet, that is), cook until all the mussels are open, about 5 minutes. Remove the lid, sprinkle with parsley, and taste the broth, adding salt and pepper to taste. Discard any mussels that haven't opened. Spoon some mussels and tilapia into a wide bowl, and pour some broth over it. Serve with a hearty slice of toasted baguette, seasoned with olive oil, salt and pepper.

Friday, April 22, 2011

Chili, take #35

Chili is one of those things that I've never made the same way twice. I have yet to find the 'perfect' recipe, and my favorite chilis I've eaten have been made by Potbelly's and my friend KP - and they're not giving up their recipes anytime soon.


I'm not even sure that this recipe counts as chili, because there are no chilis in it, and in fact not even many other veggies...but there are beans. Per a quick wikipedia search, it seems that 'chili' is merely a spicy stew - so I guess by that definition, this counts! (Though my version isn't even that spicy?) At any rate, I've been wanting to try out a black bean-sweet potato flavor combo for a while, and I had some ground turkey to use up as well - and considering Chicago's winter is getting its second wind, I felt like I needed a little something warm and comforting to counteract the still-dropping temperatures outside.


This chili is hearty, healthy, and full of aromatic spices like cumin, coriander, and even cinnamon - which goes perfectly in this recipe, and was a stroke of genius on my part at the last minute :)


First, you brown the meat, and get the veggies chopped and in the pot.


Then, you add the spices and let them really toast and coat all the ingredients with their delicious goodness for a few minutes.


Tomato sauce and black beans finish it off.


I actually kept it on the thick side this time so I could eat it with some rice, but adding just one 14-oz can of diced tomatoes next time will take this into soupier territory, perfect for dunking tortilla chips.


Black Bean & Sweet Potato Turkey Chili


1 pkg ground turkey (about 1 1/3 lbs)
1/2 large onion, chopped
1/2 large sweet potato, chopped
2 garlic cloves, chopped
1 t salt
2 T chili powder (this chili was NOT spicy...I might add more next time!)
1 T cumin
1 t coriander
1/2 t cumin seeds (optional)
1/2 t oregano
1 small can black beans, drained and rinsed
1 c tomato sauce
2 T taco sauce or salsa (you can just add a little more tomato sauce if you don't have this)
pinch cinnamon


In a large dutch oven or stockpot, brown the ground turkey in a little olive oil over medium heat for about 6-7 minutes. When nearly cooked through, add the onion, garlic, sweet potato, and salt to the pot. Lowering the heat slightly to medium-low, add all the spices except for the cinnamon, stirring to coat all the meat and vegetables, and cook about 5-7 minutes until the veggies are just starting to get tender. Add the rinsed, drained black beans along with the tomato sauce and taco sauce, and stir to combine. Allow everything to simmer together and the flavors to merry over medium-low heat for about 10 minutes. Add the pinch of cinnamon and stir to incorporate. Serve over rice with some cheddar cheese on top.

Tuesday, April 12, 2011

Keen on quinoa

Have you heard about keenwah quinoa? It's another one of those foods that is actually ancient, but has lately been re-discovered and touted for its health benefits. Similar in size and texture to cous cous, it's cultivated in South America and is one of only a few plant-based sources that provides complete protein. I've had a box in my pantry for a while, and seeing recipe after recipe on the interwebs inspired me to cook up a few cups last week to keep in the fridge for breakfast (with oatmeal and milk) and any other great ideas that came along...like this one.


Paired with almost any fresh fruits/veggies and a little dose of dressing, quinoa becomes the perfect backdrop for a healthy and filling salad. I especially love this combination because the crunch from the radicchio and apples and the heartiness from the croutons make for a really nice texture!


Radicchio, Apple and Crouton Quinoa Salad


1 cup cooked quinoa
1/2 pink lady apple, chopped
1/2 head of radicchio, shredded
handful of celery leaves, chopped
1/4 cup homemade multigrain croutons (cube bread, toast in oven with olive oil, salt and pepper till crunchy ~ 5 min)
1 T homemade vinaigrette (lemon juice, dijon mustard, pinch oregano, salt and pepper, extra virgin olive oil)


Cook your quinoa according to package directions, and add the cooked quinoa to a medium bowl. While the croutons are baking in the oven, chop up the apple and celery leaves and thinly slice the radicchio, then add to the quinoa bowl. Pull the croutons from the oven and add to the bowl, then toss everything together with 1 T of vinaigrette - or alternatively, dress simply with lemon juice/vinegar, olive oil, salt and pepper. Because there's only 1 T of dressing in the whole salad, everything will stay nice and crisp (and not get limp and soggy) in the fridge, even for a few days - if you don't eat it first!

Tuesday, March 29, 2011

A look back at family recipes

Since I've been working so much lately, I haven't had much time to cook (which then stresses me out even more...it's a whole cycle thing). So today I thought I'd share one of my favorite posts from my now-defunct original food blog, written back in 2008. I love that certain foods and recipes can hold so much meaning to families, so much so that they're carried on forever - and this is a classic example. Do you have family food traditions? I'd love to hear them!

The most important day of my life
There comes a day in the life of every young woman of Italian heritage...a day filled with equal parts dread, excitement, and chaos. A day on which the rest of her future depends. On this day, she is put to the ultimate test...and her true colors (hopefully red, white and green) are revealed. You know what I'm talking about.
Making "The Sauce."

Sunday, August 17, 2008: My first attempt at making The Sauce - the pasta sauce recipe that has been in my family for generations.

I received the recipe for Christmas last year, in a homemade recipe book filled with Nonni's recipes (Thanks to Nonni and Aunt Susan for putting it together!). This is the sauce that I grew up on, eating it at Nonni's and at my own house for the last 23 years, usually accompanied by homemade meat and cheese ravioli or pasta.

At this point, I'd like to take a moment of silence to honor those less fortunate than myself...you know, those who aren't Italian.

Nonni gave the recipe to my mother - a gasp non-Italian - when she married my dad, so he could continue eating it for the rest of his life. If I had to name the ONE food which best characterizes the Italian family, it would be The Sauce. Each family has their own version, their own history and tradition...but each one savors it, treasures it, and NEVER wastes it. To this day, I've never seen anyone leave a drop of The Sauce on his/her plate.
So, there I was, standing nervously over the recipe in the kitchen Sunday morning. The Sauce takes 2-3 hours, and I wanted to follow every single step as closely as possible, to maximize the probability that it would turn out just like Nonni's. I gathered my ingredients on the counter before me, surveyed each one carefully, re-read the recipe, and embarked on the culinary endeavor of my lifetime.

I started with the meatballs, then worked carefully through The Sauce. Even though it has very few ingredients, I took my time and worked methodically. Then, before I knew it, the recipe was complete. There was nothing left to do...but wait.

For obvious reasons, I cannot share the recipe with you here. I'm sure you understand (however, if you are male and between the ages of 22-28 and end up marrying me, you've got a chance).

I am blissfully happy to report that after frequently and nervously watching my simmering pot for 2.5 hours, a not-so-blind taste test revealed that, while lacking some of the love of Nonni's original, my first attempt at The Sauce was surprisingly...great!


Thursday, March 17, 2011

Sometimes, you just need to COOK

Have I told you about my job? I don't think I have. WELL...I love my job. I work for a market research company and manage several accounts - we do things like test ads before they go on air to see how they perform, track brands in the market to see how people feel about them, etc - and I've really enjoyed it for most of the two and a half years I've been there. HOWEVER......we all have our days, right? Sometimes weeks? Things get nuts, projects and deadlines hit all at once despite all the planning in the world, clients call with crazy requests. The past few weeks have been like that for me, and I've gotta tell ya - I'm weary! Last night I came home and knew that only one thing could help me zone out and relax.


Chop, chop, chop. There's something so calming about preparing ingredients! I love a silent kitchen, a silent apartment - all but for the sound of my sharp knife on the cutting board, the sizzle of food as it hits hot oil in a pan. My stress starts melting away the second I get in the kitchen, and last night I forgot all about work with the first bite of my hearty vegetarian enchiladas - sweet potato, red bell pepper, and crumbled up veggie burgers sauteed with some cumin, coriander and a little cayenne, rolled up in whole wheat tortillas then baked off with a topping of tomatillo salsa and cheddar cheese.


My roommate Jenn introduced me to tomatillos in a dish she made last summer, and now every so often I get a craving for this simple salsa. What do I love most about it? It's a tie between the taste (lime-y and fresh) and the ease (NO chopping required like my other favorite, pico de gallo). 


The Simplest Salsa Ever


1 can tomatillos
1 cup loosely packed cilantro leaves
juice from 1 lime
1 jalepeno, ribs and seeds removed (I only like mild spice, so I used about 1/3 of it)


Open the can. Dump its contents into a food processor. Add the cilantro, lime juice, and jalepeno. Process until it's salsa (about 30 seconds).

Sunday, March 13, 2011

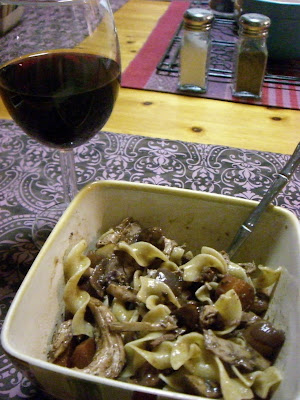
Faux au vin

I don't know why I'm just discovering this, but chicken leg quarters are CHEAP! Even not on sale, they're about $.79 a pound at my local grocery store. "Chicken leg quarters" contain the leg, thigh, and part of the back of the chicken - and are so cheap because they require less processing than other cuts sold to consumers. True, they do come with a lot of fat and a fair amount of extra bits...but I have a pretty high 'ick factor' tolerance, and I'm never one to shy away from a challenge - especially if saving money is involved!

Wondering what to do with my $3.00 worth of chicken leg quarters, I quickly discovered several recipes for coq au vin and decided to give it a try. Coq au vin ("rooster in wine") is a classic French dish - essentially, a comforting yet luxurious chicken stew. The leg quarters didn't fail me - in fact, it seems like they were built for this recipe. However, for the time and energy involved (a good 2-3 hours total), the specific recipe I used was good - but not great. I imagine, though, that like pot roast or beef stew, it'll take some trial and error before I find a recipe with the perfect combo of flavors for my tastes.

If you have a great coq au vin or other chicken stew recipe, I'd love to hear it! Anyone else out there discovered the awesome cheapness of chicken leg quarters?


Sunday, March 6, 2011

Mediterranean Turkey Meatloaf

Don't you love it when a little kitchen experimenting turns into something awesome? I had a craving for Mediterranean ingredients like feta cheese and sun-dried tomatoes, so this turkey meatloaf was born! There's a stereotype out there that things made with turkey instead of beef (like burgers, meatloaf and meatballs) are automatically dry - but I haven't found this to be true. In fact, this meatloaf was incredibly moist and PACKED with flavor! Definitely give this one a try - its quick cooking time and easy cleanup (just 1 bowl and 1 fork) make it perfect even for a weeknight.


It's hard to make meatloaf look attractive...but with prosciutto on top, what's not to love?


Mediterranean Turkey Meatloaf


1 egg
1 lb ground turkey (not ground turkey breast)
1/4 c breadcrumbs
5 sun-dried tomatoes, chopped
8 kalamata olives, pitted and chopped
1/4 small red onion, minced
1 clove garlic, minced
1/4 c feta cheese, chopped
salt and pepper
2 t fresh oregano, chopped
2 t fresh basil, chopped
2 thin slices prosciutto


Preheat the oven to 375 degrees. Crack the egg into a medium-sized bowl, and beat with a fork. Add the turkey, breadcrumbs, sun-dried tomatoes, olives, red onion, garlic, cheese, salt, pepper, and herbs to the bowl. Using the fork, fold all the ingredients into the turkey until well-combined - but don't overmix. Turn the mixture into a cooking-sprayed 5"x9" loaf pan (a muffin tin can also be used for individual portions) and smooth the top, then place the two slices of prosciutto on the top of the meatloaf. Bake for about 15 minutes, or until internal temperature has reached 165 degrees.


Note: Feel free to adjust the amounts of the 'add-ins' to your taste. Capers, lemon zest and goat cheese would also be terrific in this!

Monday, February 28, 2011

Dinner with friends, and a fudge SUCCESS!

After a whirlwind past week and weekend, I'm finally getting caught up and am excited to share with you how I spent my Valentine's Day! I don't know about you, but sometimes I just like an excuse to get dressed up...so I invited some girlfriends over for a dinner party complete with fussy food (risotto!), sparkly dresses (sequins!) and decadent desserts (nutella!). I even busted out my chef's jacket to protect my dress while I pranced around the kitchen in heels. [Men, are you hearing this? I cook and I wear heels in the kitchen.]

All the ladies, minus the one taking the picture
For dinner, I stuck with some classic yet elegant basics. One package of boneless, skinless chicken breasts turned into fresh herb-seasoned chicken cutlets (halved longwise, pounded thin, flour-egg-breadcrumbs, air-dried on a rack over a baking sheet for 10 minutes, pan-fried), and they were served up with easy sauteed spinach and creamy risotto - both infused with a hint of lemon and garlic to tie it all together.

Not the most creative presentation...but delicious!
The star of the show on Valentine's Day has got to be dessert. I wanted to make sure I had two different things to offer my friends - one intense and rich and sweet, the other a little lighter but still satisfying. Martha Stewart's cranberry-almond biscotti (though made with whole wheat pastry flour) was a great Valentine's Day treat because of the pop of color from the red cranberries, and they were perfect for dunking in coffee. This other recipe, though - OH. EM. GEE. Probably the best fudge I've ever had, and more importantly, it turned out like fudge and not like dirt candy! SUCCESS! Thanks to Nnr for directing to me to Cookin' Canuck's hilarious blog post with the recipe from Giada.


Chocolate Nutella Fudge with Sea Salt
(adapated from Cookin' Canuck)

1 (14 oz. ) can sweetened condensed milk
1 t vanilla extract
1 heaping c dark chocolate, chips or chopped (I used 72% cacao)
1 c Nutella
3 T unsalted butter, cut into 1/2-inch pieces
Sea salt, approximately 1/2 t

Line an 8x8 square pan or a pie dish with parchment and spray with cooking oil. Add the sweetened condensed milk, vanilla, chocolate, nutella and butter to a medium glass or stainless steel bowl. Place the bowl over a small saucepan filled with a few inches of boiling water, and stir with a spatula or wooden spoon until the chocolate is completely melted and the mixture is smooth, about 5-7 minutes. Empty the mixture into the pan, and sprinkle the top evenly with the sea salt - depending on the grain of your salt, you may want to use a little less than the 1/2 t called for. Refrigerate until firm, at least 2 hours. When ready, use the parchment to lift the fudge from the pan and cut into 3/4-inch squares. Note: limit yourself to 8 pieces of fudge per night, and bring the rest in to work when it gets too hard! :)

Wednesday, February 16, 2011

The end of the Pantry/Freezer Challenge

Someone once said that all good things must come to an end...and right now, that good thing is the Pantry/Freezer Challenge. Today's post wraps up my month-long personal challenge to cook exclusively from my pantry and freezer, only supplementing what I had on hand with fresh fruits and vegetables.


-I kicked things off with a veggie burger recipe inspired by my time in Americorps, when my 11 roommates and I learned to flourish on a tight budget by often substituting legumes and whole grains for more expensive animal protein.


-Even after one week, I noticed myself being more mindful of my food habits, and a little pizza party proved that you don't need fancy ingredients or lots of dough (hehe) to entertain.


-Next, I marveled at the wonderful recipe-healing properties of parmesan cheese when a barley risotto recipe doesn't turn out as expected.


-After a trip to Stanley's produce market, I learned that homemade gnocchi is not as daunting as it seems, and also...I need to buy a candy thermometer.


-Starting to see the light (at the back of my freezer, that is), I shifted my brain into autopilot and pulled together a tried and true classic for a weeknight dinner.


-Finally, the Chicago blizzard of 2011 begat an impromptu snow day, and thus an excuse for a hearty snack with a special spread.


I'm really glad I decided to take on this challenge. Beyond identifying some funny stockpiling habits (apparently I fear a shortage of hoisin sauce) and an obvious reminder to avoid impulse buying in the future (Alton Brown lost 50 pounds eating sardines, right?), the Pantry/Freezer Challenge reminded me of something important. I feel strongly that my food choices should reflect my ideals of eating a less meat-centric diet, supporting local agriculture, and avoiding unnatural ingredients, among other things - and by stepping out of the grocery store for the past month, it's helped me reconsider how much I spend, on what types of food, and where.


I hope that I can keep moving in the right direction.


Anyone out there inspired to do a challenge of their own? Have any other challenge ideas for me? :)

Saturday, February 12, 2011

Snow-day special

Finally a post for this week! I caught the flu last weekend, and have been fighting against it ever since with lots of sleep and tea and taking it easy. The sooner I can kick this bug to the curb, the sooner I can be back to cooking and feeling fantastic. But yes, folks - even with the flu, the challenge continues...


I whipped up this recipe during Snowmaggedon Snowpocalypse Thundersnow the third largest blizzard in Chicago history. We had all been encouraged to work from home that day rather than try to brave the weather and make it into the office - and I have to say that working from the couch, in my pajamas, in the comfort and warmth of my apartment sounded A-OK to me.


I did venture out to see the car graveyard on Lakeshore Drive at lunch...yikes!


I decided to make bread because in true Pantry/Freezer Challenge form, I had used up all other 'vessels' for my homemade nut butter - crackers, pretzels, etc - and was starting to judge myself for eating it with a spoon directly out of the jar. The easy, hands-off nature of this bread recipe is incredibly appealing to someone with a mild fear of yeast and kneading, like myself - and is much cheaper than getting a bread machine! Its crumb is moist, not too dense, and has great flavor, making it a perfect vehicle for just about anything.


I've made this successfully several times, with a number of options for substitutions based on what you have on hand.


This loaf didn't rise as much as usual (it was extra dry in my apartment) - but still turned out great!


No-Knead Whole Wheat Bread
adapted from King Arthur Flour


1 c lukewarm water (about 110 degrees)
1/4 c orange juice (or lemon juice, or water/lemon juice combo)
1/4 c olive oil (or melted butter, or veg oil)
3 T molasses (or honey, or maple syrup)
2 t yeast
1/4 c dry milk 
1 1/4 t salt
3 c whole wheat flour (or a mix of whole wheat and AP)
optional: 2 T ground flaxseed


Note: This recipe is not recommended if you do not have a stand mixer. The dough is quite sticky and thick, and is no match for a hand mixer's beaters.
Combine all the ingredients in the bowl of your stand mixer. Using the paddle attachment (not the bread hook), beat for 3 minutes on high. Scoop/scrape the sticky dough into a parchment-lined and greased loaf pan (8 1/2" x 4 1/2"), and cover with greased plastic wrap. Allow to rise in a warm place for 60-90 minutes, until the dough has at least risen to the top edge of the loaf pan. In the meantime, preheat your oven to 350 degrees, and when it's ready remove the plastic wrap and bake for 20-25 minutes, until the top is golden brown. Pull the bread out of the oven and tent the top with foil so it doesn't get too dark, and return to the oven (rotated) for another 15-20 minutes. It's done when you can 'knock' the top and it makes a sound - but you can also stick in a knife to be sure :)


To make this blustery snow day extra special, I decided to turn some beautiful Stanley's apricots into a sweet accompaniment for my freshly baked bread.


Bonus Recipe: 
Makeshift Apricot Jam
(makes 1/2 c)


3 large ripe apricots, chopped
1 heaping T raw sugar
1 piece star anise
1 piece whole nutmeg
roughly 1/2 c water
1 T white wine
1 T lemon juice


In a 2-qt saucepan, add the chopped apricots, sugar, whole spice pieces and just as much water as necessary - the fruit shouldn't be covered, but almost (I used about a half cup) - and bring up to a simmer. Allow the mixture to simmer on low-medium low, stirring occasionally, until the apricots have softened and the water is evaporated - about 20-30 minutes (use the back of a spoon to test the doneness of the fruit - if it resists, it's not done). Remove the spices from the jam, stir in the white wine, and return to a simmer for another 5 minutes. Remove from the heat, stir in the lemon juice, and transfer to a heat-safe glass jar or container. Serve warm on freshly baked bread, or refrigerate for future use.